Shop
- Epoxy Box
- Tools
Practice
Ch 6 - Empennage
Ch 7 - Wing
Ch 8 - Fuselage
Ch 9 - Canopy
Ch 10 - Landing Gear
Ch 11 - Engine
Ch 12 - Cowling
Ch 13 - Paint
Ch 14 - Weight and Balance
Ch 15 - Flight Testing
Electrical
Upholstery
Links
Contact
| SHOP |
||
| Chapter
hours: TOO
MANY
Total Hours: 0 |
||
| Kit aircraft have been constructed in every imaginable space, from
studio apartments to fully equipped aircraft hangars. Many are
built in garages. Some are built utilizing state of the art CNC
tools or laser cutters, others with simple hand tools. I
decided to go for a balance of practicality in both the aircraft, and
the methods used to build it. For each builder, some attributes
of the build are more important than others. For me, the shop in
which the aircraft is constructed was vitaly important, following the
notion that the finished product will be representative of where it
came from, or rather, a solid foundation is a cornerstone of a
precision build. I'm on shop version two, due to relocation, and expect at least one more relocation before this project is complete. I do have room for the empennage build, which is all I expect to complete before moving again. As some others have stated, having the build as close to home as possible will make it easier to stay engaged versus starting it at the airport, or other location away from home. |
||
Tables:
Go on a forum, or EAA meeting and ask what kind of table(s) you should
have for building airplanes with. You will get nearly as many
answers as there are people. Which is right? The correct
answer is whatever works best for y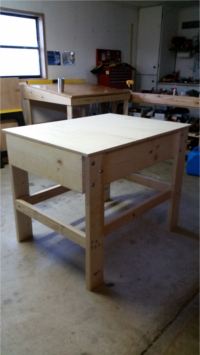 ou.
Some prefer the "EAA
tables", others prefer to build a table worthy of supporting a house
with engineered beams, and yet others simply bolt some sturdy framing
lumber together and say "get on with the build already". ou.
Some prefer the "EAA
tables", others prefer to build a table worthy of supporting a house
with engineered beams, and yet others simply bolt some sturdy framing
lumber together and say "get on with the build already". I have three (3) separate 36"x48" torsion box tables that can be leveled and bolted together to form a 3'x12' table if needed. Otherwise, the separate tables can be easily moved and used independently. The "torsion box" construction is simply a framework sandwiched between two skins. The principle of it is to carry more load while using lighter and fewer materials. Having a "skin" (plywood sheet) on the bottom as well as the top surface helps to stiffen the structure, and resist warping by counteracting any forces from the top surface. This is also supposed to help keep it flat and level. 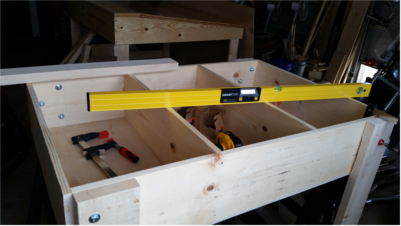 First off, I am no woodworker. I will own that. Metal has always been my medium of choice, and can do quite well if something needs to be welded or machined, but I have never fully appreciated the skill of woodworking until these tables. I glued and screwed the first frame together with no fixture or jigging, leaving it to dry overnight with the "assumption" that I could manipulate it a little as needed to fit up to the plywood, which was perfectly square. I learned the next day that wood glue has a cured strength of several thousand pounds per square inch, and does not take well to being manipulated. In the ensuing battle to get the frame square, which ultimately involved a crude fixture and several nylon cargo ratchet straps, a couple glue joints failed. While the joints did not physically come apart due to them also being screwed together, the "bang" they made just from the glue failing was pretty impressive, and made me glad they were also screwed, lest the whole thing might have come apart violently. On subsequent tables, I squared the frame up with a carpenter's square as it was being built, and rigidly jigged it down to dry. The table top on the "short" 36" ends are flush with the frame. This is to facilitate rigidly joining the tables together when a larger table is needed. On the "long" 48" sides, the top overlaps the frame by 2" to facilitate clamping fixtures and workpieces to the table. A couple coats of polyurethane on the top of each table and the edges should help protect the plywood from splintering, and facilitate easier removal of epoxy (maybe). 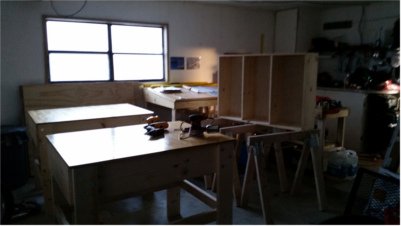 Total time working on tables: approx. 72 hours. I took a lot of time on these. Wanted them to be useful long beyond this build. |
||
Drafting
Table: This was not in the plans, nor have I seen it in anyone
else's plans yet, but it fits in with my approach of keeping everything
neat and organized. I built a "drafting table" for tracing
templates on, keeping a drawing out but away from epoxy while building,
and also for storing drawings. It's tall enough to work with while
standing up, and the hinged lid allows all of my manuals and drawings
to stay clean while dust and epoxy are flying through the air.    Total time working on drafting table: approx. 22 hours. |
||
| Fiberglass cutting
box: Not much use for the RV, but while building a canard, I learned quickly that trying to handle 40" rolls of fiberglass,
roll it over a wet part, then hold it and cut it is an exercise in
futility. It results in fiberglass strands running in all
directions, lots of spilled epoxy, and cuss words scattered all over
the shop. The best way to handle fiberglass cloth is like any
other. Have a large table to cut it on, then roll up the
individual pieces and unroll them on the piece you are working
with. Much better. My cutting box is mounted to the wall, has metal rods (3/4" rigid conduit) to hold the rolls, and a folding door with folding legs that is like a double-jointed murphy bed. 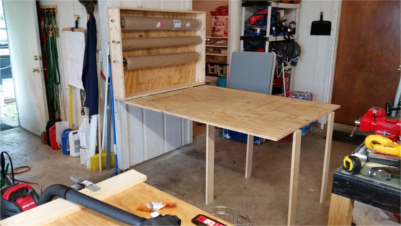 The rods pull out of the ends to replace rolls as they are used. I made room for four rods, to have two rolls of each fiberglass at a time, but so far have only been using three, and just leaving extra rolls sealed up in plastic on the shelf. 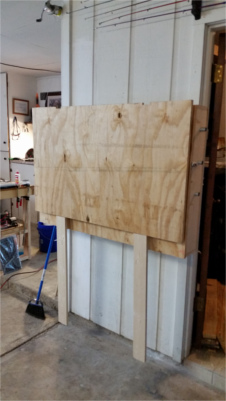 |