Shop
- Epoxy Box
- Tools
Ch 3 - Practice
Ch 4 - Fuse Bulkheads
Ch 5 - Fuse Sides
Ch 6 - Fuse Assy
Ch 7 - Fuse Exterior
Ch 8 - Headrests, Heat duct
Ch 9 - Main Landing Gear
Ch 10 - Canard
Ch 11 - Elevator
Ch 12 - Canard Install
Ch 13 - Nose Gear
Ch 14 - Centersection Spar
Ch 15 - Firewall
Ch 16 - Control System
Ch 17 - Trim
Ch 18 - Canopy
Ch 19 - Wings, Ailerons
Ch 20 - Winglets, Rudders
Ch 21 - Strakes, Fuel, Bags
Ch 22 - Electrical
Ch 23 - Engine
Ch 24 - Covers, Fairings
Ch 25 - Finishing
Ch 26 - Upholstery
Links
Contact
| SHOP Epoxy Box |
||
| Chapter
hours: TOO
MANY
Total Hours: 0 |
||
| The
Epoxy Box: I decided to use MGS L335 epoxy for my aircraft. Epoxy
has an affinity for moisture, which will ruin it. As such, most
folks keep their epoxy in a heated box, to help keep the moisture out,
and to keep the viscocity of the of the epoxy low, as lower viscocity
epoxy will "wet-out" the fiberglass better, making for easier, faster
layups, and lighter parts. A few different ideas have surfaced over time with regards to keeping epoxy warm and dry, and being able to dispense it with ease. I chose to forego the epoxy "pumps" used by some and instead use a gravity feed system like some others have done. Pumps have a tendency to clog and/or entrain air. Any dispensing system I have seen has its pros and cons. Pick your poison.....
My epoxy box is constructed of plywood, with "R-board" insulation. Inside are three paint cans,
unused from Home Depot. There is one gallon can, and two quart cans, to
hold the MGS L335 resin, and MGS H335F and MGS H340S
 hardeners (catalyst),
respectively. I made holes in the bottom of the paint cans to fit
3/8" size tubing bulkhead fittings. The bulkhead fittings pass
through both the bottom of the can, as well as the bottom of the
box. A flat washer under each paint can around the bulkhead
fittings takes up the space created by the bottom seam of the
can. Another flat washer on the bottom of the box gives the
bulkhead fitting something solid to compress against to create a
good seal. A 1/16" gasket was cut and placed between the shoulder
of each bulkhead fitting and the can to ensure a good seal. hardeners (catalyst),
respectively. I made holes in the bottom of the paint cans to fit
3/8" size tubing bulkhead fittings. The bulkhead fittings pass
through both the bottom of the can, as well as the bottom of the
box. A flat washer under each paint can around the bulkhead
fittings takes up the space created by the bottom seam of the
can. Another flat washer on the bottom of the box gives the
bulkhead fitting something solid to compress against to create a
good seal. A 1/16" gasket was cut and placed between the shoulder
of each bulkhead fitting and the can to ensure a good seal. 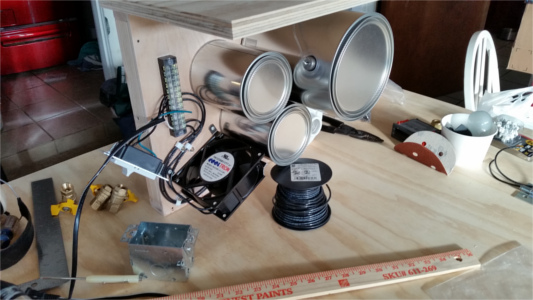 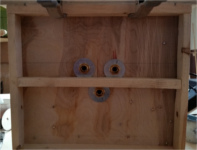 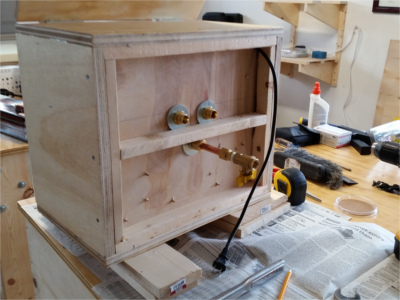 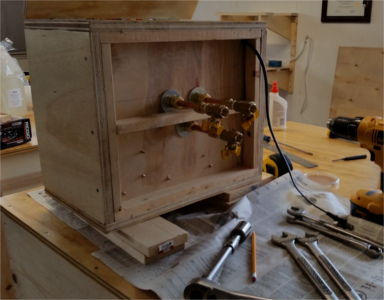 To provide heat, a 25W incadescent light bulb is mounted inside the box. Control of the heat is threefold. A differential temperature controller monitors the temperature and triggers the lamp on and off. A dimmer switch controls the intensity of the light. Additionally, a fan circulates the air inside the box to keep the temperature uniform and regulated. 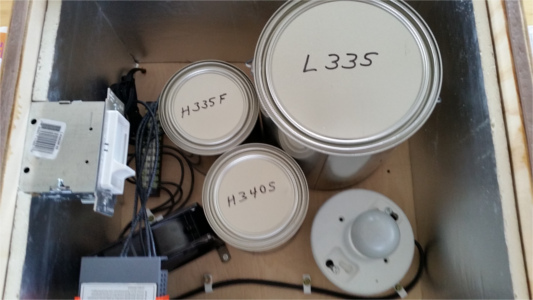 At first I planned to build the epoxy box as a stand alone shelving unit that could be easily moved around. Over the years I have learned to appreciate ergonomics though. I have designed the shop thus far to fit me, meaning that 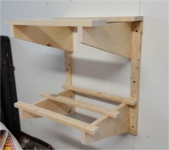 as
much as possible, I don't have to squat, bend over, lean or otherwise
contort myself to work on something. To pull this off with the
epoxy box meant that it needed to be mounted 56" off the floor so I
could dispense epoxy onto the scale without stooping down and peering
at it. Given the overall height of the unit this would create, it
would also create a pretty unstable structure, so I opted to just mount
the entire unit to the wall with a shelf under it for the
balance. as
much as possible, I don't have to squat, bend over, lean or otherwise
contort myself to work on something. To pull this off with the
epoxy box meant that it needed to be mounted 56" off the floor so I
could dispense epoxy onto the scale without stooping down and peering
at it. Given the overall height of the unit this would create, it
would also create a pretty unstable structure, so I opted to just mount
the entire unit to the wall with a shelf under it for the
balance.   The differential temperature controller was actually a last minute add-on. I was originally going to just adjust the dimmer until I found a setting that would maintain temperature close to what I was looking for. I've used similar DIN-style controllers for years in industry, and they are a perfect fit for this application, but usually cost prohibitive at several hundred dollars. Just for fun, I searched for them online one day to see what they would cost. Surprisingly, I found this one on Amazon for $16. There are a handfull of them available there, cheaply made from Aisa. This particular model was private labeled by a company called InkBird. It includes a temperature probe, and the contacts are rated 10A. The controller maintains temperature within one degree F. They also offered a PID unit with solid state variable external SCR output relay for $45 that could control even tighter, but I'm building an airplane, not a reactor, so that finite of control is unnecessary, so I reigned myself in and saved that extra $29 for more epoxy. I might, however, obtain one later for a composite post-curing box that I am considering........ 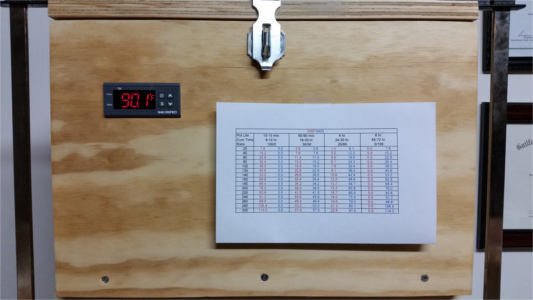 Temperature controlled epoxy boxes were not mentioned in the plans. They are one of the ingenious improvements developed by the experimental builders community over the years through collective intelligence and problem solving. < PREVIOUS PAGE NEXT PAGE > |
||